Frequently Asked Questions
Here you will find tips for Supplies Line inks and toners.


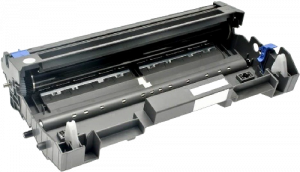
Reset the drum unit
Drum Unit BD-1030 (DR1030) TFO 10K
Printers: DCP-1510E, DCP-1512, DCP-1512E, DCP-1610WE, MFC-1810E
- The printer must be turned on
- Press the MENU buton
- Use the UP or DOWN arrows to select MACHINE INFO, select OK, then select RESET DRUM and hold OK for 3 seconds
- To reset the drum module, press the UP arrow
- ACCEPTED should appear on the display
- Press the EXIT key on the printer to complete the drum reset procedurę
Printers: HL-1110, HL-1110, HL-1112E, HL-1210WE
- The printer must be turned on
- Open the front cover and leave it open
- Press the POWER button four Times
- Close the front cover
Drum Unit BD-2000 (DR2000) TFO 12K
Printers: DCP-7010, DCP-7025
- The printer must be turned on
- Open the front cover and leave it open
- Press the OPTIONS button and confirm the drum replacement with the UP ARROW buton
- ACCEPTED appears on the display
- Close the front cover
Printers: MFC-7225N, MFC-7420, MFC-7820N, FAX-2920
- The printer must be turned on
- Open the front cover and leave it open
- Press the OPTIONS button and press the button 1 (when the device asks if the drum has been replaced)
- ACCEPTED appears on the display
- Close the front cover
Drum Unit BD-2100 (DR2100) TFO 12K
Printers: HL-2140, HL-2150N
- The printer must be turned on
- Open the front cover and leave it open
- Press the white button on the left side of the printer housing and keep it pressed for 5 seconds
- When all the LEDs on the printer light up, release the buton
- Close the front cover
Printers: HL-2170W, DCP-7045N, MFC-7320, MFC-7840W, MFC-7440N
- The laser printer must be turned on
- Open the front cover and leave it open
- Press the CLEAR / BACK buton
- Press button 1 to confirm drum replacement
- ACCEPTED appears on the display
- Close the front cover
Drum Unit BD-2220 (DR2220) TFO 12K
Printers: HL-2240, HL-2250DN, HL-2270DW
- The printer must be turned on
- Open the front panel
- Press the GO button on the printer’s housing for 5 seconds, all diodes should light up
- Close the front panel
Printers: DCP-7057E, DCP-7060D, MFC-7360N, MFC-7460DN, MFC-7860DW
- The printer must be turned on
- Open the front panel
- Press the CLEAR buton
- The display should ask if the drum has been replaced
- Press the UP arrow buton
- The device will confirm the selection by displaying ACCEPTED
- Close the front panel
Drum Unit BD-2300 (DR2300) TFO 12K
Printers: HL-L2300D
- The printer must be turned on
- Open the front panel
- Press the GO button on the printer’s housing for 5 seconds, all diodes should light up
- When all 4 LEDs are lit, release the GO buton
- Close the front panel
Printers: HL-L2340DW, HL-L2360DN
- The printer must be turned on
- Open the front panel
- Press and hold the OK button for 2 seconds until the display shows DRUM
- Press the OK buton
- Press the UP ARROW key to display Reset and Reset Drum Counter.
- Close the front panel
Printers: DCP-L2560DW, MFC-2720DW, MFC-L2740DW
- The printer must be turned on
- Press the CANCEL (X) button to abort the error
- Press the SETTINGS button (looks like a screwdriver and wrench)> All Settings> Device Information. > Service life of parts
- Press and hold # until the LCD message changes
- Press DRUM
- Click YES
- Press BACK
Printers: DCP-L2500D, DCP-L2520DW, DCP-L2540DN, MFC-L2700DW
- The printer must be turned on
- Open the front panel
- Press and hold the OK button for 2 seconds
- Press the up arrow key or 1 to reset the drum counter
- Close the front panel
Drum Unit BD-3100 (DR3100) TFO 25K
Printers: HL-5240, HL-5250, HL-5270
- The printer must be turned on
- Open the front panel
- Press the GO button on the printer’s housing for 5 seconds, all diodes should light up
- Close the front panel
- The DRUM diode should go out, the drum status should be 100%
Printers: MFC-8460N, MFC-8860DN, DCP-8060, DCP-8065DN
- The printer must be turned on
- Open the front cover and leave it open
- Press the CLEAR / BACK buton
- Press button 1 to confirm drum replacement
- ACCEPTED appears on the display
- Close the front cover
Drum Unit BD-3200 (DR3200) TFO 25K
Printers: MFC-8370, MFC-8380, MFC-8880, DCP-8070D, DCP-8085DN
- The printer must be turned on
- Open the front cover of the printer and leave it open
- Press the CLEAR / BACK buton
- Press button 1 to confirm drum replacement
- ACCEPTED appears on the display
- Close the front cover
Printers: HL-5340DL, HL-5350DN, HL-5370DW, HL-5380
- The printer must be turned on
- Open the front panel of the printer
- Press the GO button on the printer’s housing for 5 seconds, then all diodes should light up
- Close the front panel of the printer
- The DRUM diode should go out, the drum status should be 100%
Drum Unit BD-3300 (DR3300) TFO 30K
Printers: DCP-8110DN, DCP-8150DN, DCP-8155DN, DCP-8250DN
- The printer must be turned on
- Open the front cover of the printer and leave it open
- Press the CLEAR / BACK buton
- Press button 1 to confirm drum replacement
- ACCEPTED appears on the display
- Close the front cover of the printer
Printers: HL-5440, HL5450DN, HL-5450DNT, HL-5470DW, HL-5470DWT, HL-6180DW, HL-6180DWT
- The printer must be turned on
- Open the front panel of the printer
- Press the GO button on the printer’s housing for 5 seconds, all diodes should light up
- Close the front panel of the printer
- The DRUM diode should go out, the drum status should be 100%
In devices with an additional touch panel:
- The printer must be turned on
- Choose STOP / EXIT, then MENU
- Use the UP / DOWN arrows to select MACHINE INFO, and then DRUM
- We choose YES
Printers: MFC-8510DN, MFC-8520DN, MFC-8710DW, MFC-8810DW, MFC-8910DW, MFC-8950DW, MFC-8950DWT
- The laser printer must be turned on
- Open the front cover and leave the printer open
- Press the CLEAR / BACK buton
- Press button 1 to confirm drum replacement
- ACCEPTED appears on the display
- Close the front cover of the printer
In devices with an additional touch panel:
- The printer must be turned on
- Choose STOP / EXIT, then MENU
- Use the UP / DOWN arrows to select MACHINE INFO, and then DRUM
- We choose YES
Drum Unit BD-3400 (DR3400) TFO 50K
Printers: HL-L5000D, HL-L5100DN (T), HL-L5200DW (T), HL-L6200DW (T), HL-L6250DN, HL-L6250DW
- The printer must be turned on
- Make sure the front cover is open.
- Press and hold the OK button for about two seconds to display Drum Unit, then press the OK button.
- Press a to select Reset.
- Close the front cover
Printers: HL-L6300DW (T), HL-L6400DW (T), DCP-L5500D, DCP-L5500DN, DCP-L5600DN, DCP-L5650DN, DCP-L6600DW, MFC-L5700DN, MFC-L5700DW, MFC-L5750DW, MFC- L5750DW L5755DW, MFC-L5800DW, MFC-L5900DW, MFC-L6700DW, MFC-L6750DW, MFC-L6800DW, MFC-L6900DW
- The printer must be turned on
- Close the front cover.
- Press „X” to fix the error.
- (For HL models) Press „settings” > „Info. Machine Info. ”>“ Parts Life ”(For DCP and MFC models) Press“ Settings ”>“ Info. about device ” > Part durability.
- (For HL models) Press Drum Life until the message on the Touchscreen changes, and then press Yes. (For DCP and MFC models) Press Drum until the message on the touchscreen changes, and then press Yes.
- Press.
Drum Unit BD-B023 (DR-B023) TFO 12K
Printers: DCP-B7520DW, HL-B2080DW, MFC-B7715DW
- The printer must be turned on
- Make sure the front hatch is closed.
- Press the OK buttons and the UP arrow key simultaneously.
- Press OK to select the DRUM.
- Press DOWN ARROW to reset the drum counter.


